Trailer Wiring Shorts: Diagnosing Flickering or Dead Lights
August 2, 2026 · PartsNow Guides
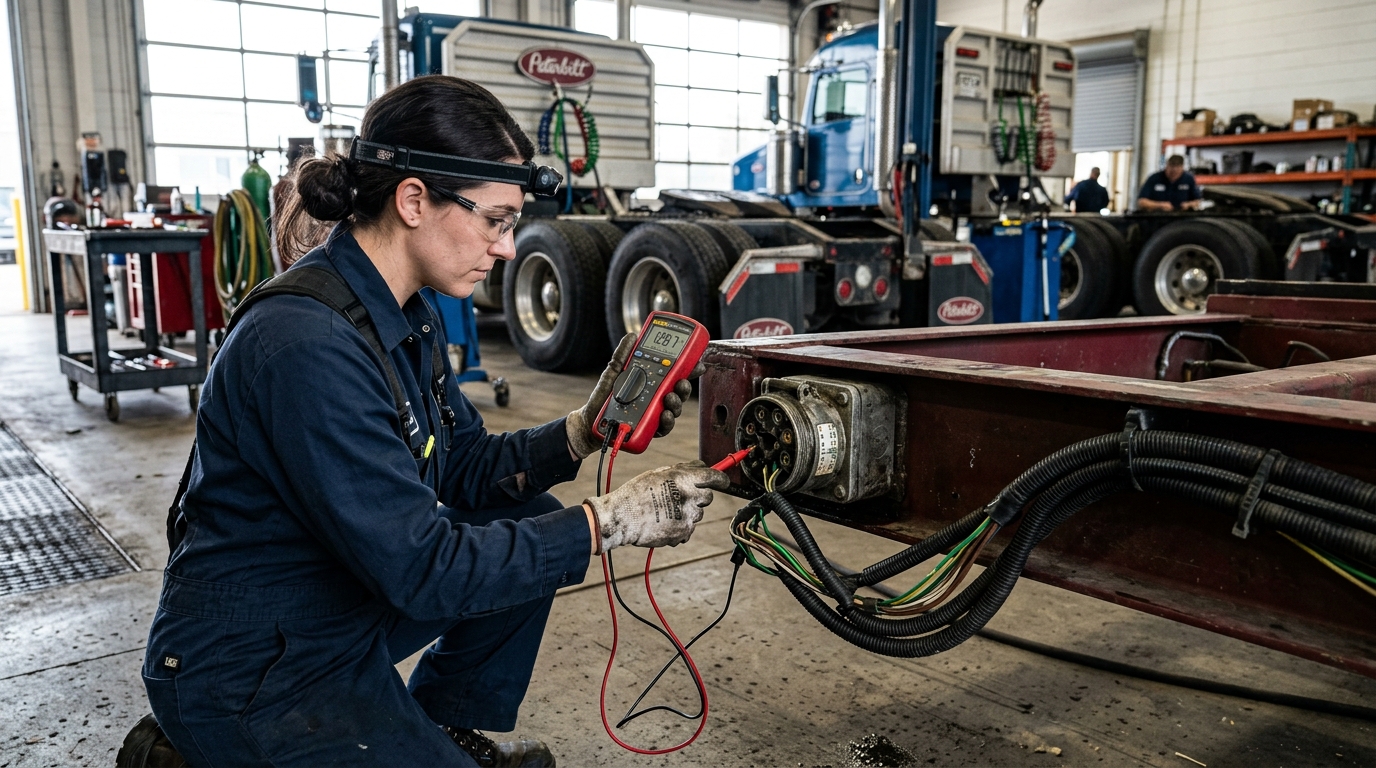
You're running down the interstate at night and the driver behind you flashes his lights—your left brake light's flickering like a bad strobe. Or worse, you hook up a trailer and every turn signal on it just refuses to work, and the fuse in the tractor blows again the second you plug in. If you've been turning wrenches on trucks for more than a week, you already know this isn't rare. It's one of the most common calls a fleet mechanic gets, and it's almost never as simple as "the bulb's out."
Trailer wiring lives a hard life. It gets dragged through slush, baked on hot asphalt, chafed against frame rails, and plugged/unplugged thousands of times. Add in cheap pigtail connectors and grounds that were never really clean to begin with, and you've got a recipe for intermittent gremlins that drive everybody crazy—because the light works fine in the yard and fails on the road.
The good news: trailer electrical problems follow patterns. Chafed wires, corroded grounds, and bad 7-way connections cause the vast majority of flicker and fail complaints. This guide walks through a systematic way to run them down with a multimeter instead of just throwing parts at the problem.
Start With the 7-Way Connector — It's the Usual Suspect
Before you crawl under the trailer, check the 7-way connector on both the tractor and trailer sides. This is the single highest-failure point in the whole system because it's exposed to road spray, salt, and constant plug/unplug cycles.
- Pull the connector apart and look for green or white corrosion on the pins
- Check for bent, pushed-back, or loose female pins — a pin that's lost its spring tension won't make solid contact even if it looks fine
- Wiggle the harness at the connector while a helper watches the lights — if they flicker with movement, you've found your problem right there
- Look at the rubber boot/seal for cracks that let moisture in
Dielectric grease on clean pins helps, but it won't fix corrosion that's already set in — replace the connector if pins are pitted or the housing's cracked. A five-dollar connector causes more service calls than almost anything else on the trailer.
Check Your Ground Before You Chase Anything Else
A bad ground causes more phantom electrical complaints than actual bad wires. Trailer lights are ground-return circuits — power goes out on the colored wire, and the light body grounds back to the frame. If that ground connection is corroded or loose, you get dim, flickering, or cross-fed lights (brake light comes on when you hit the turn signal, that kind of thing).
- Find the ground wire (usually white) where it bolts to the frame
- Remove the ring terminal, clean both the terminal and the frame contact point back to bare metal
- Check for surface rust or paint under the terminal — paint is not a conductor
- Reinstall with a star washer or serrated washer to bite through any coating, per OEM spec if a specific ground strap kit is called for
Do this at every ground point on the harness, not just one. Multiple lights sharing a bad common ground is one of the most common causes of a whole trailer going dark or flickering together.
Testing With a Multimeter — Voltage Drop, Not Just Continuity
A lot of guys check continuity and call it good, but continuity testing won't catch a corroded connection that still passes some current under no load. Voltage drop testing is what actually finds the problem.
- Set your multimeter to DC volts
- With the circuit powered and the light ON, put one probe on the battery-side power source and the other on the light's power terminal
- Anything more than a small voltage drop (per OEM spec for your circuit, but generally under half a volt for a healthy connection) means you've got resistance somewhere in between — a bad splice, corroded pin, or chafed wire
- Repeat the same test on the ground side, from the light's ground terminal back to the battery negative
Move your test points along the harness section by section until the drop shows up between two points — that's where your fault lives. This beats guessing and swapping bulbs all day.
Finding Chafed Wires and Physical Damage
Chafing usually happens where the harness rubs against the frame, crosses over an axle, or gets pinched near the kingpin area. It's rarely visible from a quick glance — you have to run your hand along the harness and feel for damage.
- Follow the harness from the 7-way back to the light clusters, checking every zip-tie point and frame crossing
- Look for shiny bare spots on the frame where the harness has been rubbing
- Squeeze the harness gently — a wire with a nicked jacket often feels slightly flat or has a soft spot compared to the rest
- Check near the landing gear and mud flap brackets — common pinch points
- Any spot where the insulation is cut through and touching metal is a dead-short waiting to blow a fuse the moment it flexes just right
Don't just tape over a bare wire and call it fixed — cut out the damaged section and splice in new wire with heat-shrink connectors, then re-route it away from the contact point so it doesn't happen again.
When It's Intermittent: Isolate With a Test Light Under Load
Intermittent problems are the worst because they hide when you're staring right at them. A test light with a load (not just an LED probe) is your friend here because it draws current similar to an actual bulb and will expose a weak connection that a no-load meter reading might miss.
- Load-test each circuit at the 7-way pins on both truck and trailer side
- Have a helper work the brake pedal, turn signal switch, and hit bumps in the harness route while you watch the test light
- Any flicker under load with the harness stationary points to internal wire damage rather than a connector issue
- If the flicker only shows up when the trailer flexes (going over bumps, turning), suspect a wire that's nearly broken inside the insulation — it's still making contact but just barely
Document which circuit and under what condition the flicker shows up. That narrows your search area before you start cutting into harness sections.
Quick answers
Why do my trailer lights work fine in the yard but flicker on the road?
Road vibration and flexing expose weak connections that look fine when the trailer's sitting still. Check the 7-way connector pins and any ground points for corrosion, and wiggle the harness at connection points while watching the lights for the exact spot causing the flicker.
What's the most common cause of a trailer light fuse that keeps blowing?
A chafed wire touching bare frame metal is the usual cause — it creates a direct short every time the harness flexes just right. Run your hand along the harness at frame crossings and pinch points to find the bare spot before you just keep swapping fuses.
Should I just replace the whole trailer harness if I can't find the short?
Not necessarily — a full harness replacement is expensive and often unnecessary if the problem is isolated to the 7-way connector or a ground point. Do the voltage drop test first to narrow down the section causing trouble before committing to a full harness swap.
Parts for this job
Real products from the PartsNow catalog. Confirm fitment with Mike before ordering.


Still not sure what's wrong?
Mike — the free AI truck consultant — will walk through your exact symptoms and point you to the right part. No account, English or Spanish, 24/7.
